Search This Blog

Thursday, October 8, 2015

Selfies!

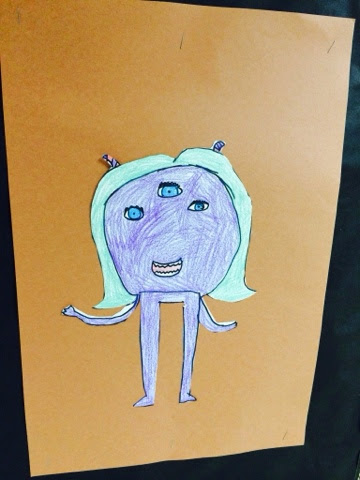
Welcome to a new school year! Our first project is always self-portraits. This year they are on a smartphone and we made Selfies. I found the smartphone on Pinterest. I think it's from Teachers Pay Teachers. First we studied different artists' self-portraits and discussed why someone would paint themselves or even  take a selfie. My answer is to show people what you look like at that time. I demonstrated how to draw the facial features. After students drew their selfies, they were able to design a background and case for their phone, if they didn't want to leave it white.


These are just some of many- I don't have pictures from my other school yet. 
Here you can kind of see the Cat in the Hat I made for my wall:


It's always a challenge to come up with interesting new ways to draw self-portraits each year. I think the kids liked this one the best. 

Monday, September 28, 2015

"Oh, the Places You'll go!"

Here are some of the decorations we used this year on our hallway for our "oh, the places you'll go!" theme at one of my schools!
I drew the book cover on big banner paper and colored it with markers:


My wall for some future artwork:

Then some random photos of decorations I bought at Mardel:


I also drew the Cat in the Hat in a hot air balloon for another wall of mine:

Lots more decorating photos to come!

Monday, August 18, 2014

Favorite Quote Painting

I just finished a project I have been painting on and off all summer. It's a quote you may have seen before:
"The 'earth' without 'art' is just 'eh'"

First I started with an old canvas from a friend that I painted over with 2 coats of gesso.

Next I drew the letters with pencil

Then I began painting 
After that I added the last two colors to brighten it up. 


Here it is, finished in all it's glory:

I can't wait to hang it up at school!!

Sunday, August 17, 2014

A work in progress: Classroom 1

The beginning of a new school year always brings on lots of new opportunities for changing up my two art rooms. This year I decided to take before, during, and after pictures. Since this is a work in progress I just have the "before" and "during" part right now.


Here is the top of my white board after I redid it:


 It says "you have the power to create super artwork" because our theme is super heroes.
There's lots more work to be done!!

Friday, August 8, 2014

getting ready for a new school year!


The other day my friend and I worked on our hallway and for the first time ever we got it all done in one day!! We did things a little simpler this time to follow the new fire code rules. I'm very happy with the way it turned out and I don't think we've been done this early before. Our theme this year is world travel.
I can't wait to get some artwork up there!


This is my friends's wall:


Now it's time to do the other school with our superhero theme. This year both themes are different so I get the chance to change things up.

The only thing I have done at the other school so far is hang up my superman clock.

I guess it's TIME I go over there :)

Tuesday, June 10, 2014

Penguin in the Summer

I created "penguin in the summer" as an end of the year project to go along with these penguin drawing instructions I found online: http://makingartfun.com/htm/f-maf-printit/learn-to-draw-cartoon-penguin.htm
The goal of the penguin drawing exercise is to have a unique drawing, and for students to be creative with the details of the penguin. Last year I had the students draw a summer background, like the penguin went on summer vacation. The only rule is that they had to incorporate the penguin (have to draw it step by step, no tracing) and the background has to be a vacation spot.
This year I decided to change it up and turn it into a collage.

Step 1: students draw the penguin by following the instructions. Students can draw many penguins or just one. If they are tiny, students must draw more than one. I found a great YouTube video about penguins that I showed them on day 1 of this project.

Step 2: students draw anything else they want in the collage such as beach ball, surf board, etc. All of these little drawings get outlined, colored, and cut out.

Step 3: students made the beach by collaging the dark blue contraction paper for water, and manila paper for sand, on top of the light sky blue paper. Then the little drawings are glued on top.


Tuesday, May 13, 2014

There's a Monster in My Room!!

There's actually lots of monsters in my room! They are made by my 3rd graders. Third grade students learned about geometric and organic shapes, and different textures when making these monster drawings. First, they used their imaginations to come up with an original monster drawing. They had to use both geometric and organic shapes. Then we talked about different textures their monsters could have- bumpy, scaly, furry, spikey, etc- and they drew the texture as a shape. Next, they outlined with black Sharpie, colored with bright construction paper crayons, and cut it out. The last and best step is when they were done cutting, they glued the monster drawing to a brown paper for the door to their room and on the reverse side they wrote a story about the monster!
Love these every time! Check it out: